Creating a custom WordPress theme requires combining code and design to bring a unique, functional website to life. Each step in the process demands precision to ensure usability, performance, and style come together seamlessly. Missing key details or skipping essential stages can lead to a subpar product that fails to meet expectations.
With the help of our experts, we’ll walk you through every phase of custom WordPress theme development — from setup to final coding — so you can create a site tailored to your needs.
1. Establish a Local Development Environment
Before building a WordPress theme, setting up a reliable local environment is essential.
Here’s how:
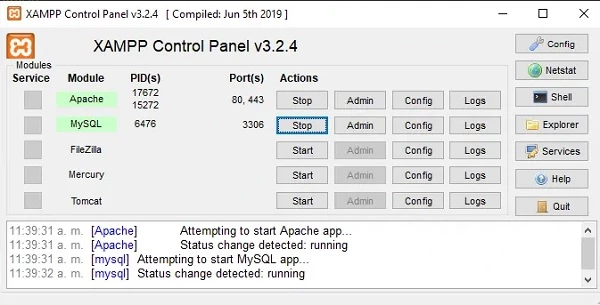
- Install a tool like XAMPP or Local by Flywheel to simulate a server on your computer. These platforms allow you to run WordPress without an internet connection.
- Once installed, download the latest WordPress files from WordPress.org.
- Extract the files into the local server’s root directory, such as the htdocs folder for XAMPP.
- Create a database for WordPress using phpMyAdmin or a similar tool.
- Open your browser and navigate to http://localhost/your-folder-name to begin WordPress installation.
- Set up admin credentials during the process, as these will grant access to your dashboard.
- Within the wp-content/themes folder, create a new directory and name it descriptively, such as custom-theme.
- Use a code editor like Visual Studio Code and set the newly created theme folder as your project workspace.
2. Create Core Theme Files
WordPress themes require specific core theme files to work properly. For now, create empty files named style.css, index.php, and functions.php within your theme folder.
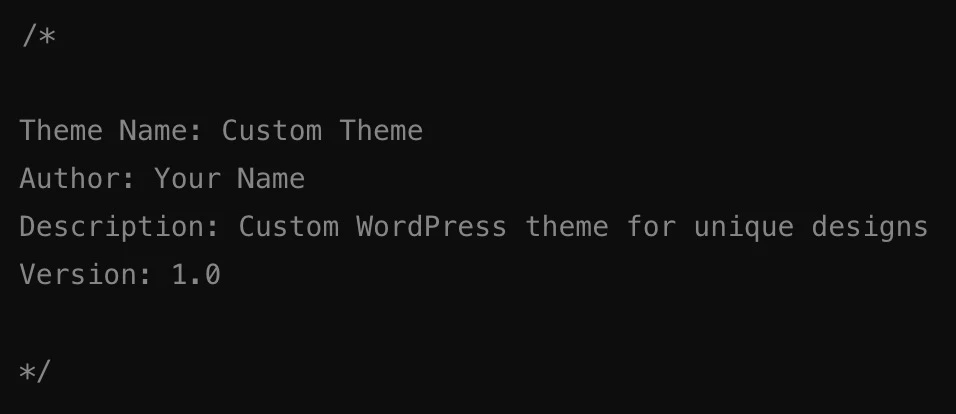
- style.css
The style.css file contains your theme’s meta information and CSS styles. Start with this bare minimum in style.css:
- index.php
The index.php file is WordPress’s main template for displaying content. It also serves as a fallback for all other templates.
- functions.php
The functions.php file allows you to add custom functionality, like supporting menus or adding scripts.
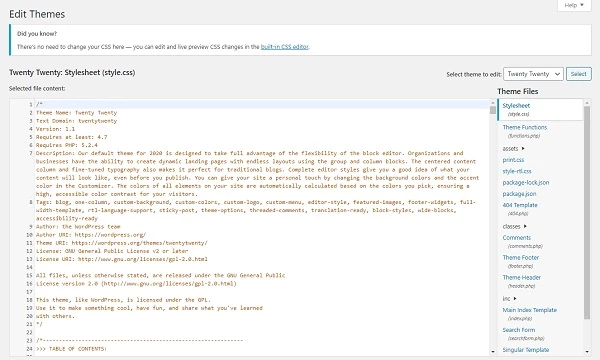
3. Define the Theme in style.css
The header comment block in style.css defines your theme’s identity within WordPress. Use the following structure to include more metadata:
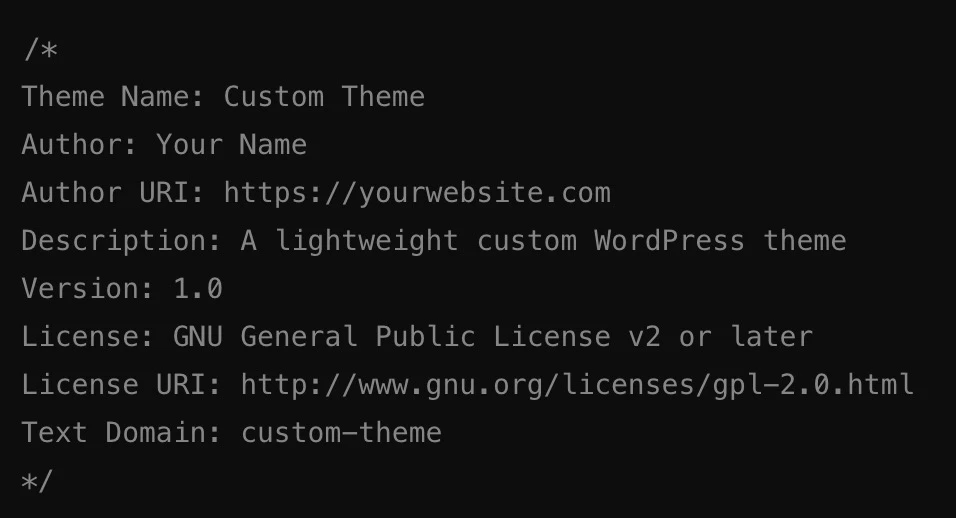
The Text Domain field is critical for theme localization, enabling translations for multilingual websites. Including this information ensures that WordPress recognizes and categorizes your theme correctly.
4. Build the index.php File
The index.php file forms the backbone of your theme. Start by adding a basic structure:
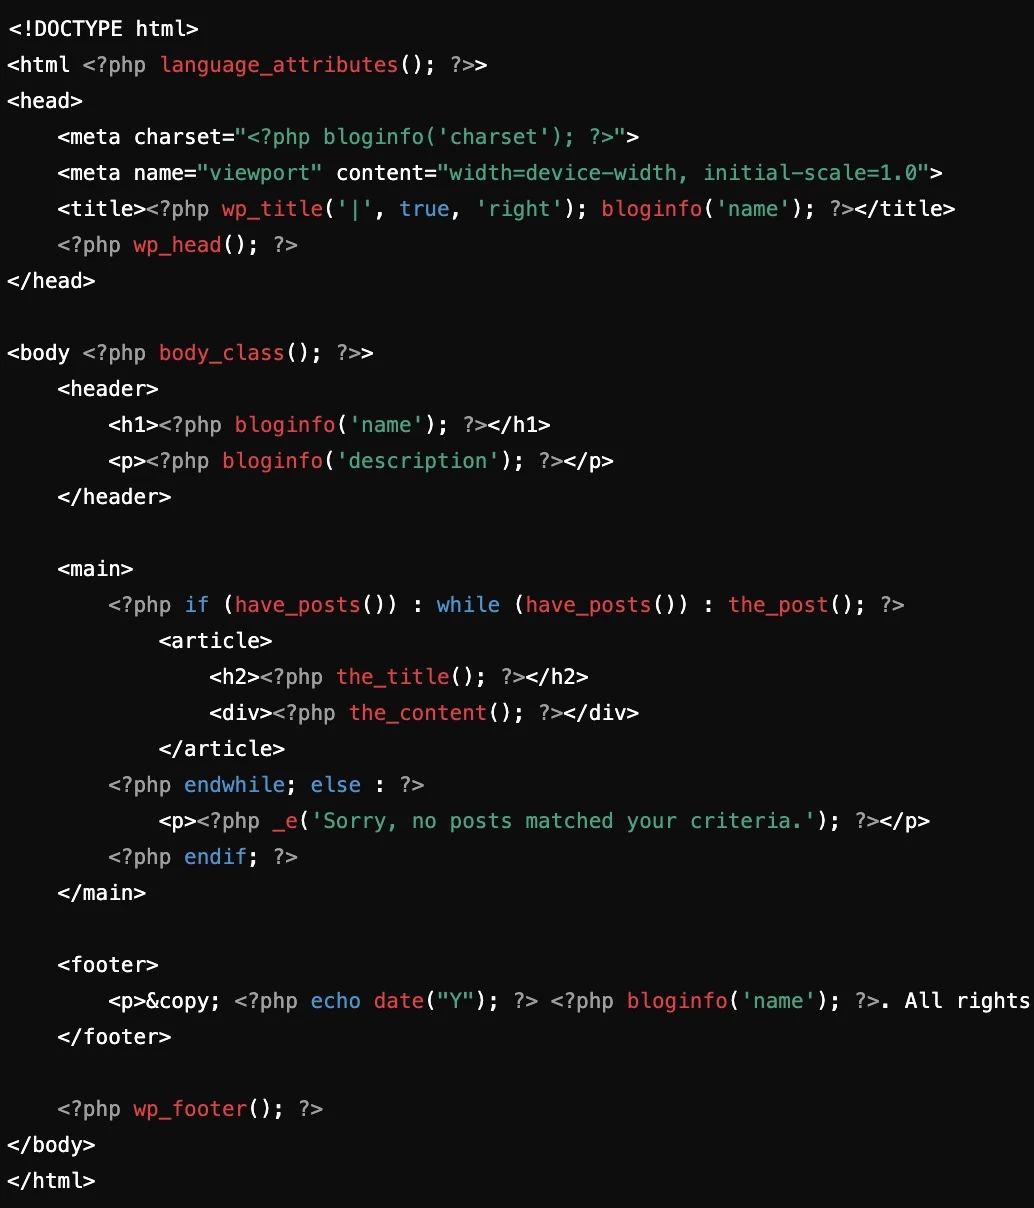
This code dynamically fetches your site’s content and ensures compatibility with WordPress functions.
5. Create a functions.php File
The functions.php file is the gateway to WordPress’s advanced features. Utilize it to register menus, widgets, and theme supports. Add this snippet to enable custom menus and thumbnails:
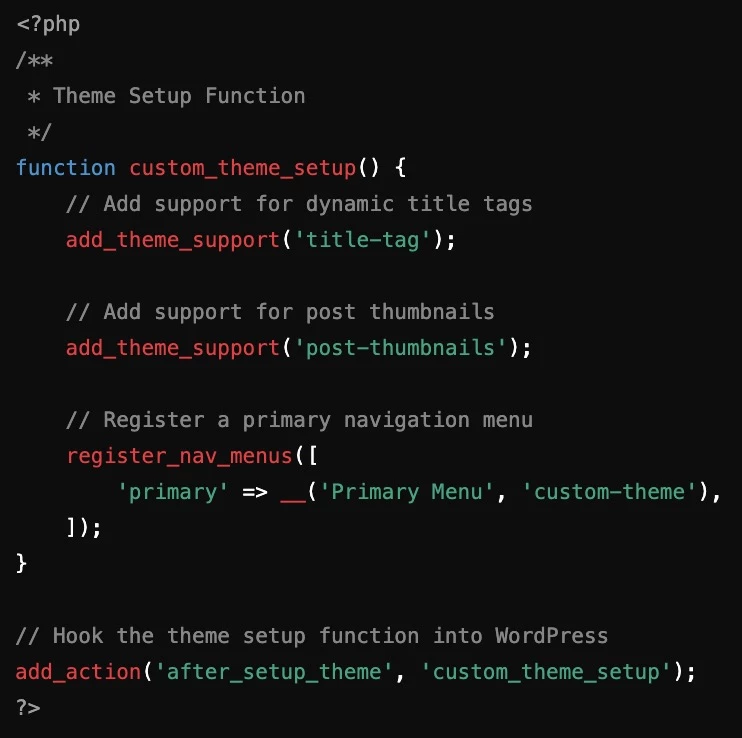
The add_theme_support function ensures your theme is compatible with built-in WordPress features, while register_nav_menus defines navigation areas.
6. Structure Layout Using Template Files
Breaking the layout into reusable components is a best practice.
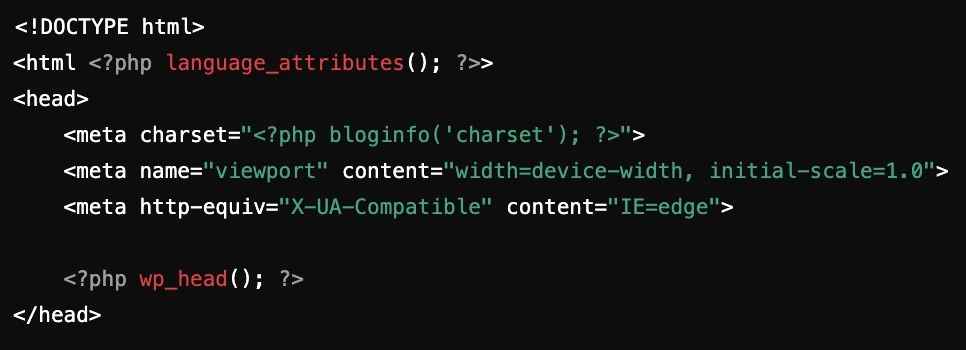
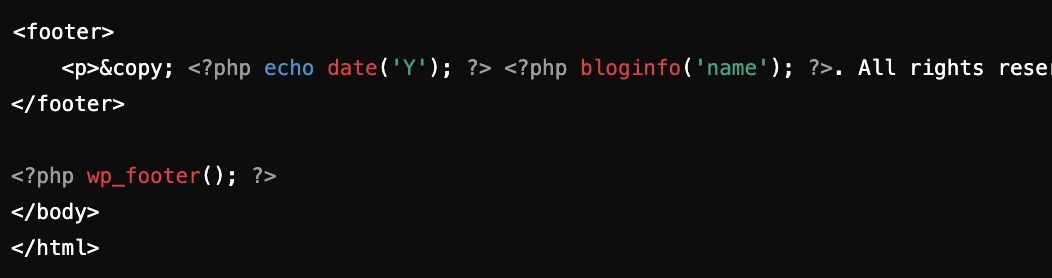
- Start by creating header.php and footer.php.
- Move the <head> section into header.php:
- In footer.php, include:
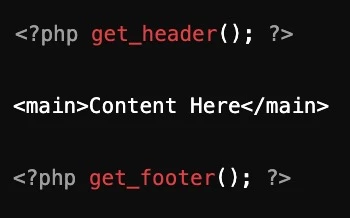
- Insert these templates into index.php using:
7. Style the Theme With CSS
Create a cohesive design using CSS. In style.css, define global styles for body and typography:
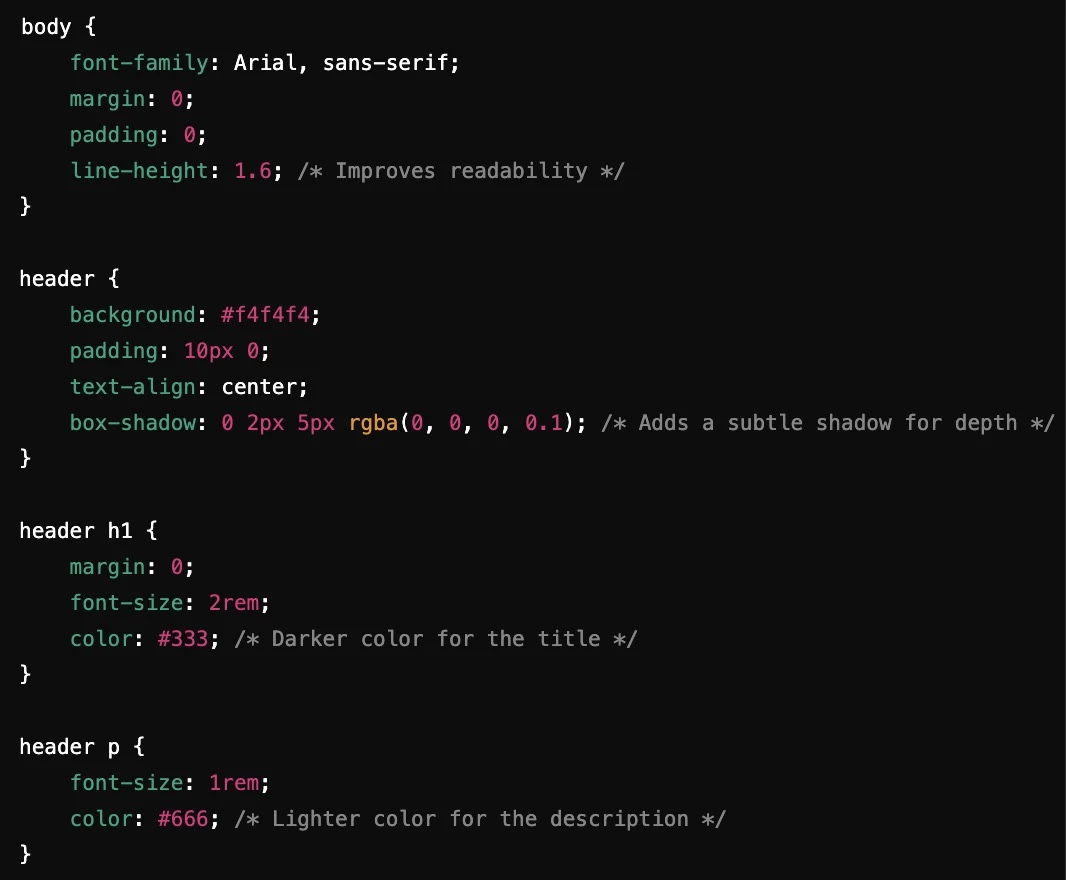
Add specific styles for different sections like menus or buttons to maintain visual consistency.
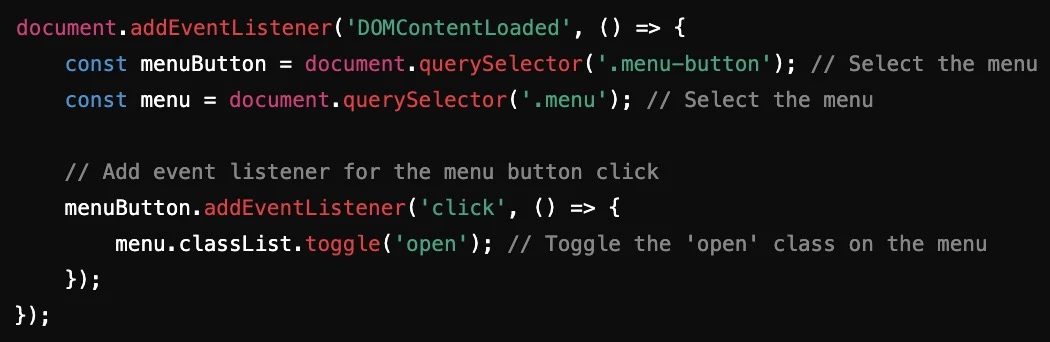
8. Use JavaScript for Dynamic Features
JavaScript adds interactivity to your site. Create a scripts.js file and enqueue it in functions.php:

Within scripts.js, implement dynamic features:
9. Test Your Theme Thoroughly
Debugging ensures a polished final product. Enable WP_DEBUG in wp-config.php:
define('WP_DEBUG', true);
Test responsiveness with browser developer tools and ensure compatibility across major browsers. Use plugins like Query Monitor to detect errors or performance issues and tools like Lighthouse to measure site speed and accessibility.
10. Optimize for Speed and SEO
Use tools like Gulp or Autoptimize to minify your CSS and JavaScript. Add meta tags for better search visibility in header.php:
<meta name= “description” content= “Custom WordPress theme for modern websites”>
You can optimize the content further by integrating an SEO plugin like Yoast. It’s best to get help from an expert SEO agency if you’re unfamiliar with search engine optimization.
11. Finalize and Export the Theme
Lastly, be sure to compress your theme folder into a ZIP file. Navigate to the WordPress dashboard, upload the ZIP under Appearance > Themes, and activate it. This step confirms your theme’s usability. Then, share your theme or expand it further based on client feedback.
By following these expanded steps, you’ll create a functional WordPress theme and gain insight into best practices for development.
Key Considerations for Developing a Custom WordPress Theme
When building a custom WordPress theme from scratch, you should consider several factors to make sure it’s functional and offers a great user experience (UX). Here are the key considerations to keep in mind:
- Balancing design and functionality
- Optimizing performance
- Strengthening security
- Improving accessibility
1. Balancing Design and Functionality
Crafting a user-friendly theme demands a harmonious blend of design and functionality. Visual elements like typography, color schemes, and layouts shape the initial impression, captivating visitors and encouraging engagement. However, without intuitive navigation and responsive design, even the most attractive themes can frustrate users.
Functionality ensures that a WordPress website operates smoothly, allowing users to find information effortlessly. Features such as clear menus, fast load times, and mobile compatibility are essential for retaining visitors. When these elements are seamlessly integrated with appealing design, the UX becomes both enjoyable and efficient.
Attaining this balance requires you to understand your audience’s needs and preferences. Conduct regular user testing and feedback to guide adjustments, ensuring that both design and functionality meet user expectations. Ultimately, a well-balanced theme not only attracts visitors but also keeps them coming back.
2. Optimizing Performance
Fast-loading websites help keep users engaged and reduce bounce rates. To minimize load times, compress images and use a content delivery network (CDN).
Adding caching mechanisms through plugins like W3 Total Cache further improves speed by storing static copies of pages. Regularly monitoring performance with tools such as Google PageSpeed Insights ensures that updates don’t introduce slowdowns.
Optimizing for speed requires consistent attention to all elements impacting site efficiency.
3. Strengthening Security
A secure theme protects both site owners and visitors from malicious threats. Here are some best practices to ensure your theme’s security:
- Validate and sanitize user inputs to prevent injection attacks, which are a common vulnerability.
- Update your WordPress core files, plugins, and themes regularly to close security gaps.
- Incorporate HTTPS to ensure encrypted communication between the server and users.
- Use security plugins like Wordfence or Sucuri for additional layers of defense.
- Store regular offsite backups to ensure recovery options in case of a breach.
Addressing these aspects builds trust and prevents potential disruptions.
4. Improving Accessibility
Accessible themes ensure websites can be used by individuals with diverse abilities. Here are some key practices:
- Use semantic HTML tags to improve screen reader compatibility and provide structure to your content.
- Add ARIA roles to communicate the purpose of elements to assistive technologies.
- Test color contrast to ensure that text is readable against background colors.
- Ensure clear navigation with headings and focus states for users relying on keyboards.
- Use tools like Axe or Lighthouse to identify accessibility gaps and provide actionable fixes.
By prioritizing accessibility, you expand your audience and demonstrate inclusivity.
How To Develop a Custom WordPress Theme: Takeaways
Creating a custom WordPress theme demands a structured and thoughtful approach. Starting with core files and carefully incorporating performance, security, and accessibility ensures a strong foundation.
Each step ensures the theme functions smoothly while providing an engaging UX. Regular testing and refinement are essential for maintaining quality and meeting user expectations.
By following these principles, developers can create themes that stand out for their efficiency, inclusivity, and reliability, fulfilling both technical and creative goals.
![]()
If you’re looking to take your custom theme further or need expert support, partnering with the right agency can make all the difference.
Our team ranks agencies worldwide to help you find a qualified partner. Visit our Agency Directory for the Top Web Development Companies, as well as:
- Top WordPress Development Companies
- AI Web Design Agencies
- Front End Web Development Companies
- UI/UX Design Agencies
- Top Web Development Companies in Chicago
Our design experts also recognize the most innovative design projects across the globe. Visit our Awards section to see the best in design.
How To Develop a Custom WordPress Theme FAQs
1. Is creating your own WordPress theme challenging?
Crafting a WordPress theme from the ground up is relatively straightforward if you possess knowledge of HTML, CSS, and PHP. Nevertheless, the process can be time-consuming.
2. Is it profitable to design WordPress themes?
Yes, designing WordPress themes can be profitable. Developers typically sell their designs for around $59 per license. Marketplaces like Envato, ThemeForest, and CodeCanyon, provide opportunities to monetize WordPress themes. For instance, ThemeForest alone boasts an average annual sales figure of around $17,355.
3. How much time does it take to develop a WordPress theme?
Typically, developing a custom WordPress theme requires approximately 2 to 3 weeks, depending on the intricacy of the code. For instance, incorporating page builder functionality requires more time than constructing a responsive layout.