Over 700 new apps are added daily to App Store.
Each app has to go through a thorough process of app submission and review before it reaches its target audience.
In this article, we will review how to submit an app to App store, in a step-by-step process.
But first, there are eight mandatory steps you need to know before submitting your app to the App Store.
8 Steps To Take Before Submitting Your App To The App Store
Prior to uploading your app to the App Store, it’s advisable to go through a checklist of items that will ensure your app is successful.
This checklist should consist of these eight steps:
Step #1: Analyze The Market
42% of mobile apps fail because research about market need was not conducted.
Focus on understanding the industry and identifying your competition to establish the market size and its needs. Collect customer insights and other data to make sure your app will reach its target audience.
Step #2: Create Enticing Brand Visuals
90% of purchases are influenced by visual factors, particularly color, which can enhance brand recognition by 80%.
Think through your color themes, design and other visual materials. What will appeal most to your target audience?
This step plays a key role in the branding strategy because it helps shape your brand persona.
Step #3: Test Your App Thoroughly
Test your app repeatedly on several Apple devices to make sure all issues are resolved before the launch.
For the long-term success of your app - known as app stickiness - it’s vital to make sure there are robust quality assurance and testing procedures in place before the launch.
Step #4: Come Up With A Pricing Model
Consider the pricing plan before publishing your app. Unlike most other products, apps can generate revenue in numerous ways.
This flexibility allows creators to publish an app as a free, freemium or paid app, with or without in-app ads or purchase options.
Explore your choices, weigh advantages against disadvantages for each option and opt for the model that works best for you.
Step #5: Optimize For Store Visibility
Optimizing your app for the App Store means making sure it is listed near the top of its category, making it easily visible for potential users.
For this, you need to use:
- App Store Optimization elements such as keywords, app description and images
- A strategy for procuring user reviews
- Elements such as an app logo to align the app with your brand and an app landing page for better recognition
Step #6: Create An App Landing Page
A simple, one-page website for your app - or a dedicated page on your business’s existing website - is a potentially powerful advertising tool.
It should contain concise, to-the-point information about your app’s benefits, features and unique value differentiators that make it stand out on the market.
Don’t forget images and videos of the app in action, user testimonials and links to the App Store where it can be downloaded.
Step #7: Have A Soft Launch
Make the app available to users even before the official launch.
This allows for a better promotion strategy and an opportunity to catch some last-minute bugs and other issues. A soft launch allows users to see what the app is all about without using its core features.
Step #8: Devise A Growth Strategy
To make sure your app is being shared, place social share buttons on your app’s landing page and create a social media posting strategy that will advertise your app’s release and tease new features.
How To Submit An App To The App Store In 7 Steps
Submitting an app for iOS users to download is a different process compared to other ecosystems.
Here is a full seven-step outline on how to upload an app to the App Store:
Step #1: Create An iOS Distribution Provisioning Profile And Certificate
To distribute your app to beta testers or users through the App Store, you need a distribution provisioning profile and distribution certificate.
You can get these through Xcode, which will create and manage certificates, sign identities and register devices if automatic signing is enabled.
To do this:
- Add Developer Program account for Xcode, then, from the top menu, choose “Xcode” and then “Preferences.”
- After that, click on “Accounts” and press the “+” sign in the bottom left corner of the window and click “Add Apple ID.”
- On the next screen, enter the Apple ID and App Developer Program password you use, then click “Sign in.”
- Enable automatic signing from the Project Editor by choosing a target and selecting “General.”
- Locate the “Signing” section and click on the triangle icon to expand the settings.
- Click on the box to manage signings automatically.
- Xcode will automatically detect the new device and register it to the team’s provisioning profile. The device needs to be registered on the team’s provisioning profile in order to launch the app on the device.
Step #2: Get The App Store Connect Record
You can get your App Store Connect record in two ways:
- By creating your own App Store Connect organization and assuming the team agent role. You can sign in with the Apple ID you used to enroll in the Apple Developer Program.
- By being invited by an existing organization as a user with an Admin, Technical or App Manager role.
If you are submitting a paid app to the App Store, you will need to sign a contract covering the terms of payment first. Here’s how:
- Click “Agreements, Tax and Banking” on the App Store Connect dashboard.
- Click “Request” under “Request Contracts.”
- When the agreement appears, review it, check the box to agree to the terms and click “Submit.”
- Click “Set Up” in the Contact Info column under “Contracts in Process.”
- Click “Add New Contact” in the window that appears next and enter your info.
- In the “Bank Info” column under “Contracts in Process,” click “Set Up” and then click “Add Bank Account” to follow the directions to save your account info.
- In the “Tax Info” column, click “Set Up.” A U.S. Tax Form is mandatory, so fill out the required information. Set up any other country tax forms that may be necessary.
After you’ve completed the above, the contract’s status will now say “Processing.” After Apple has verified the info you provided, the contract will now appear under “Contracts In Effect.”
Step #3: Add Your New App
To add a new app to App Store, select “My Apps” under “App Store Connect” dashboard.
Click on the plus sign in the upper left corner. After that, click “New App.”
You will be asked to enter these details to create a new App Store Connect record:
- Platform
- App name: use keywords to optimize for discovery
- Default language
- Bundle ID: must be an exact match of the Xcode project info.plist file’s bundle identifier
- SKU: an identifier to use internally that is not visible to users
Make sure you are entering these correctly because you can’t change them later.
Step #4: Upload Your App With Xcode
- Select “Generic iOS Device” in Xcode, as the deployment target.
- From the top menu, choose “Product” and click on “Archive.”
- This will launch the Xcode Organizer that displays any archives you have made earlier.
- You will need to make sure that the current build is selected. Click on “Upload to App Store” in the panel on the right-hand side.
- Select your credentials and click “Choose.”
- In the next window that appears, click on Upload in the bottom right-hand corner.
- A success message will appear when the upload has completed. Click Done.
Step #5: Configure The App’s Metadata
- In the App Store’s Connect “App Store” tab, under the “App Information,” add your app’s category or categories and Privacy Policy URL.
- On the “Pricing and Availability” page, set your app’s price tier or set it as free.
- Add configurations to any App Store technologies in your app under the “Features” tab.
- You will notice that your app has the status “Prepare for Submission” and has a yellow dot next to it.
- Select the building you want to configure and add the information for your App Store’s product page.
- Upload JPEG or PNG screenshots of your app. Click on “Save” in the upper right-hand corner once they’re done uploading.
- Scroll down and enter your app’s description, keywords, support URL and marketing URL. Don’t forget to optimize your description for discovery using keywords.
- Upload your app’s icon in the “General App Information”, enter its version number and copyright. The app’s icon dimensions should be 1024px x 1024px.
- Click on “Edit” next to “Rating” and select the applicable options for your app.
- Enter your contact info and any notes you may have for the reviewer under the “App Review Information.
- Click “Save” in the top right-hand corner.
Step #6: Submit Your App For Review
In the “Build” section of your app’s App Store Connect record, click “Select a build before you submit your app.”
Select the build you uploaded through Xcode and click “Done” in the bottom right-hand corner. Then click “Save” in the top-right corner, followed by “Submit for Review.” You will see that your app’s status is “Waiting for Review.”
Step #7: Check Your App’s Review Status
You can check your app’s review status in App Store Connect by selecting “Activity” in the top menu and then “App Store Versions” in the left-hand panel.
It usually takes about one to three working days to get the App Store’s approval. It can take up to 24 hours for the app to appear in the App Store after approval. At each stage, you will receive email notifications.
What Do You Do If Apple Rejects Your App?
On average, over 30,000 apps are released in the App Store every month, as reported by 42Matters.
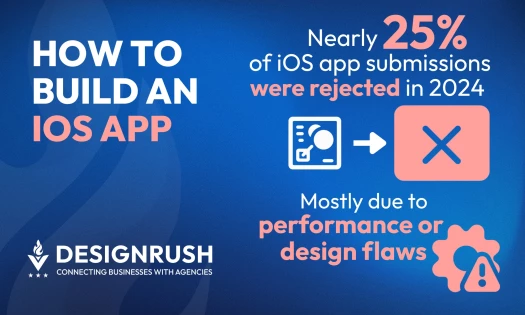
Apple undertakes a scrupulous examination of new apps and has published the 11 most common issues that lead to rejection.
Typically, 40% of submissions are rejected because of non-compliance with the guidelines concerning app completeness, meaning apps that don’t provide accurate metadata or haven’t been previously tested for bugs.
So, before you submit your app for review, make sure it’s up-to-date and complete, with all the information it requires (description, screenshots, previews).
To avoid getting turned down by Apple, follow Apple’s Developer Guidelines and the above steps. Optimizing and ensuring your app is fully functional is the best way to avoid rejection.
If you still happen to be shunned by Apple, here are a few things you can do:
- Examine the reason: You will be notified via email about the reasons why your app was rejected. To see them, you must visit the Resolution Center in iTunes Connect. There, you will find a rejection code alongside a brief description as to why your app was ruled out. For example, the reason could be the app crashed on launch. Apple also provides you with the next steps to take in order to resolve the issue.
- Fix the problem and submit again: If the reason is clear and you’re only dealing with a minor issue, like crash logs or adjusting icon size, simply fix the problem and resubmit your app. However, if you get a vague response from Apple and do not completely understand the rejection reason, look for help online. There are many people who have already encountered similar issues and can provide you with an answer or solution.
- Appeal their decision, if you think it’s a mistake: If you believe the reason behind your rejection is strange or irrelevant, you can object to Apple’s decision. Many app developers have originally been rejected but got approved upon further review. For instance, sync solution apps require users to sign in to access its features. In the first phase, Apple might deny your submission on the clause stating that apps requesting users to share personal information in order to function will be rejected. But if you reach out to Apple and clearly explain the functionality of your app, they will rethink their position and give you the thumbs up.
How Much Does It Cost To Put An App On The App Store?
When you enroll in the Apple Developer Program in order to submit an app, you need to pay the annual membership fee of $99 that will give you access to:
- Submit apps to the App Stores on all Apple platforms
- Create Safari extensions and list them in the extensions gallery
- Beta versions of Apple software
- Testing tools like TestFlight
- App analytics and advanced app capabilities
To keep your iOS apps in the App Store, you’ll need to renew your membership every year.

Takeaways On How To Upload An App To The App Store
Submitting your app to the App Store is not an easy endeavor.
Your app needs to adhere to specific iOS guidelines and go through a review process that will either approve or decline the app, which is why it’s important to adhere to the step-by-step process.
If your app gets rejected, you will need to make the necessary fixes before submitting it again for review.
You can communicate with Apple’s team through App Store Connect’s Resolution Center to escalate the issue or submit an appeal if you think your app was rejected without basis.
The one-time fee for uploading an app on the App Store is $99 per year and you need to renew your membership annually.
![]()
Our team ranks agencies worldwide to help you find a qualified partner. Visit our Agency Directory for the top app development companies, as well as:
- Top Cross-Platform App Development Companies
- Top Enterprise Mobile App Development Companies
- Top Android App Development Companies
- Top AI App Development Companies
- Top App Developers In San Francisco
Our team also highlights award-winning work on the Design Awards page, so be sure to check it out for the best and latest in app design.